EXCAP Docs
Three Modes in EXCAP
Our product supports three modes. The first two modes are IMU mode and IMU+Magnetometer mode. Almost all IMU Full-body Trackers have this function. IMU is the basis for spatial position calculation, while Magnetometer is an auxiliary tool for correcting direction. The third mode is the hybrid mode of IMU+Vision. In this mode, the camera is used as an auxiliary device to correct IMU.
Modes 1/2: IMU / IMU+Magnetometer
Using the IMU or the IMU + Magnetometer mode is quite straightforward. When no camera is connected, these modes are enabled by default.
Open Excap Studio, connect all the trackers, and then use the button located at the setting page to turn the magnetometer on or off.
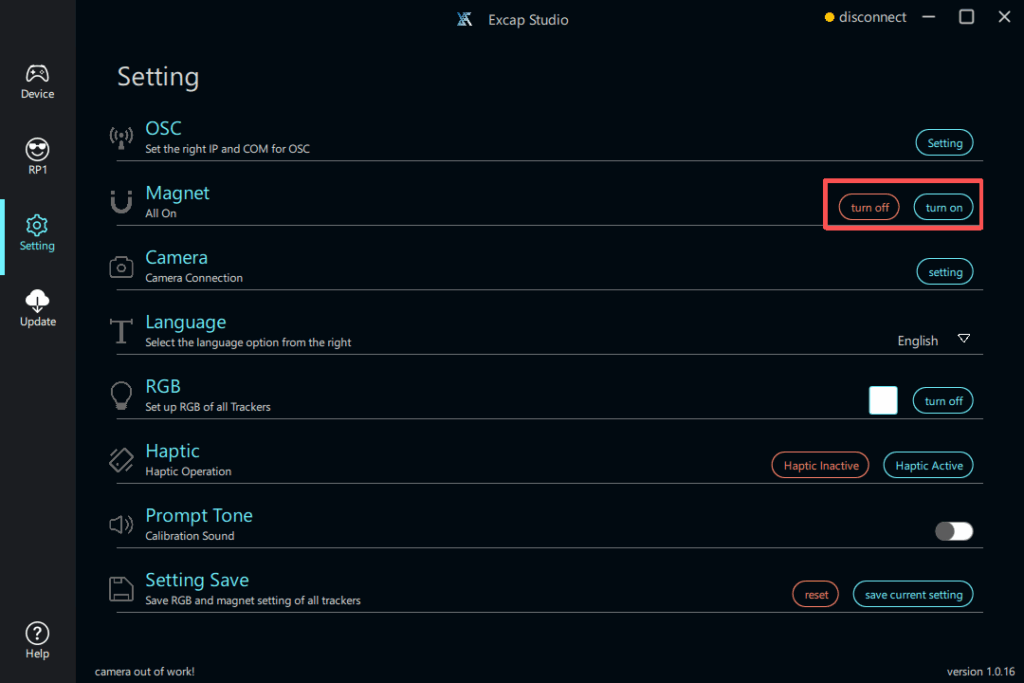
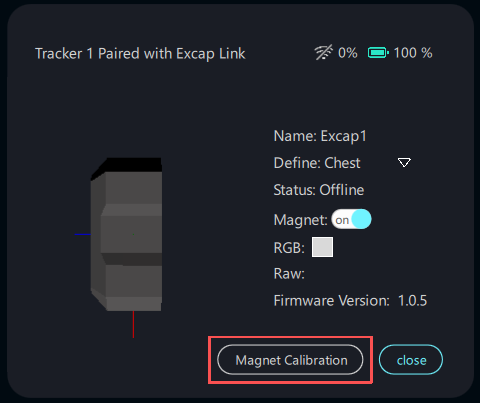
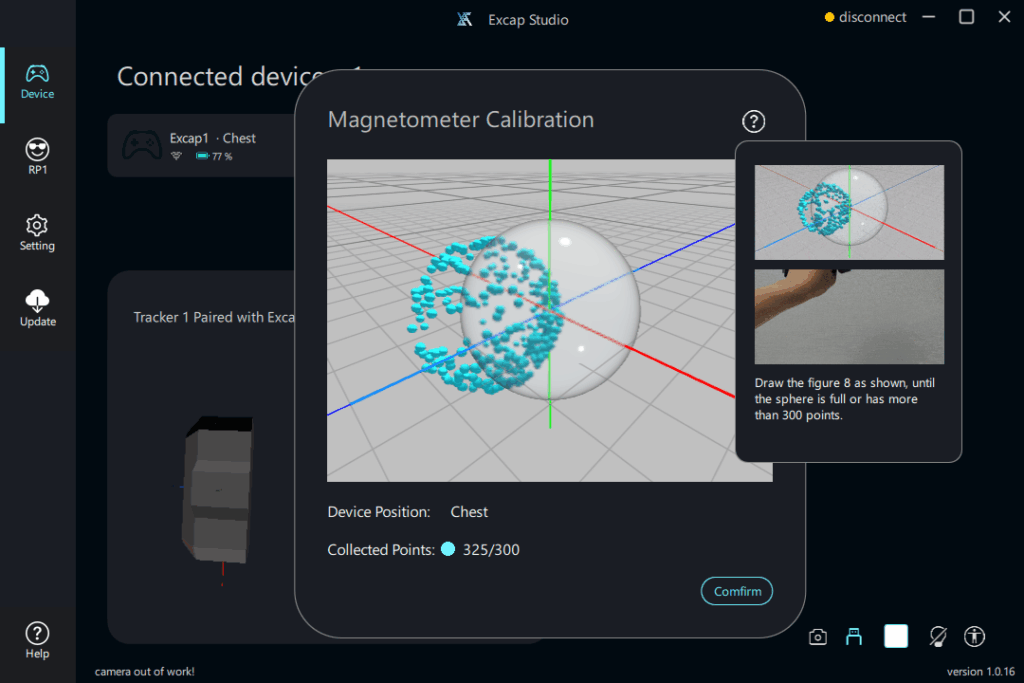
 Notice: Before you use the magnetometer mode, you need to manually calibrate the magnetometer of each tracker.
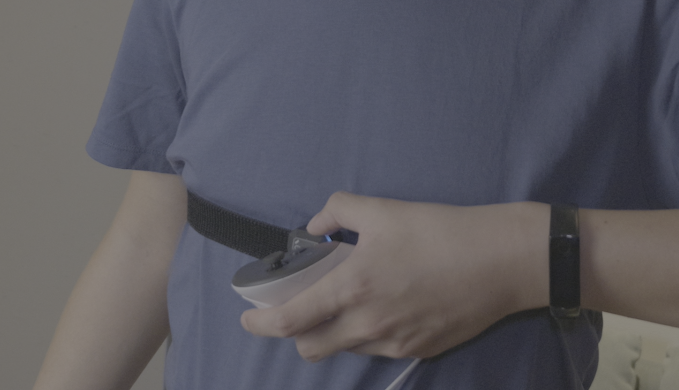
Step 1: Wear Trackers
This step is very important .
- The tracker’s switch must be facing up.
- The tracker is the front of your body.
- Make sure the tracker doesn’t slide on you as much as possible.
- 6/8 points mode are both supported, foots trackers are optional, if you do not need to move your ankles.
Step 2: Calibrate posture
Check your tracker is mounted as in front of your body as possible.
1. Reset with A-Pose
A-pose: Head and body ahead, stand up straight, feet a fist’s width apart.
Using A-Pose, you can complete the calibration by standing for 3 seconds by one step.
There two ways to trig Reset with A-pose calibration.
- Press the button shortly on the Chest tracker. (less than 1 second, or the tracker may be turned off)
- Click the Reset with A-pose button on the Excap-Studio.

2. Reset yaw
This calibration help you to calibrate the yaw axis dift cause by imu drift or inhomogeneous magnetic field. It will set all the tracker to the same toward as the headset.
There two ways to trig Reset yaw calibration.
- Press the button shortly on the Waist tracker. (less than 1 second, or the tracker may be turned off)
- Click the Reset yaw button on the Excap-Studio.
3. Reset with S-Pose
If your tracker is not mounted in front of your body, then you need to perform the S-Pose calibration to correct the orientation of the tracker.
Controlling the distance of the knees will affect the direction of the kick.
There two ways to trig Reset with S-Pose calibration.
- Press the button shortly on the Right Up Leg tracker. (less than 1 second, or the tracker may be turned off)
- Click the Reset with S-Pose button on the Excap-Studio.
4. Reset with C-Pose
Only the camera mode requires C-Pose calibration, which is used to determine the relative orientation between the camera and the tracker on the body, thereby improving accuracy.
The way to trig Reset with C-Pose calibration.
- Click the Reset with C-Pose button on the Excap-Studio.
Step 3: Adjust bone length
You can adjust it when you feel the bone length is not proper. It is recommended to adjust the bone length until the virtual foot tracker in steamVR/VRChat close to your foots than ankles. The adjustment will be saved autoly.
Mode 3: IMU+Vision
By turning on the magnetometer, the IMU gains an additional source of directional reference, which can help provide more stable orientation tracking. However, activating the magnetometer may not always result in the best user experience.
Step 1: Connecting Vision Camera
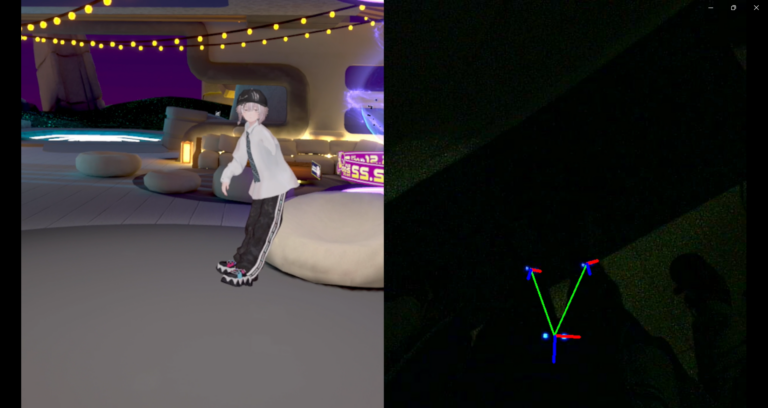
Physical Connections: You will need to mount a camera onto the headset and connect a Type-C data cable to the Headset. The camera should be set 90 degrees toward the floor.
Step 2: Connecting camera to software
- For specific instructions, please refer to the camera setting page.